Vue.js: Get and Display JSON Data with Fetch and Axios

In this tutorial we will:
- Create a simple weather app by fetching data from a local JSON file using the fetch API.
- We will create the app from scratch using Vue CLI.
- Use CSS with flexbox to make the design look good.
- Replace the fetch API with axios
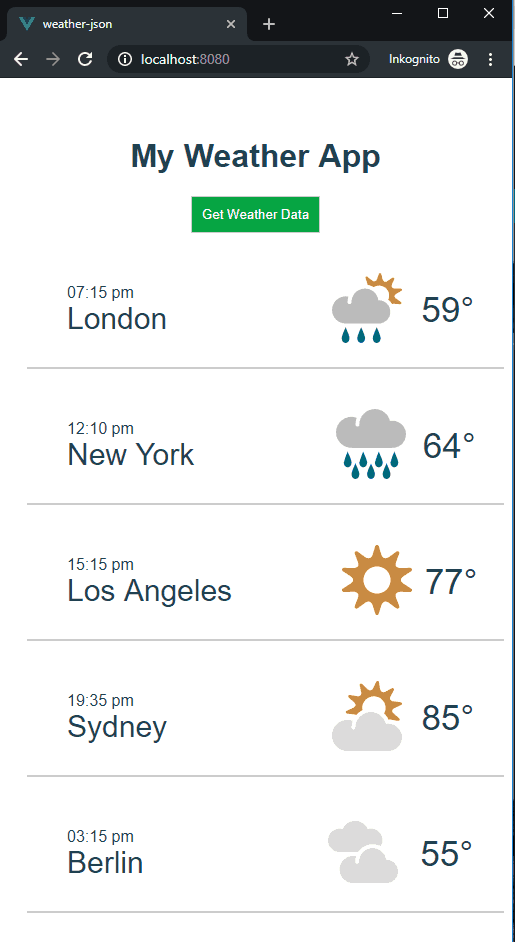
This is what the final result will look like:
#1 Create the Project with the Vue CLI
In other to use the Vue CLI, you need to download and install Node.js. Install the CLI by typing the following in a terminal.
npm install -g @vue/cliAfter the CLI is installed, create the Vue app by using the create command.
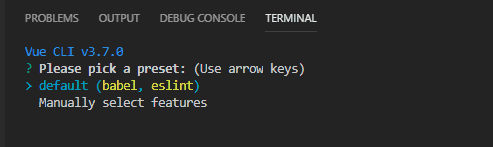
vue create weather-jsonYou will then have the option to select a preset. We will only select the default for now.
#2 Run the Vue CLI Starter App in the Browser
Now we have created a basic Vue CLI project called weather-json. Go into the folder by typing this in the command:
cd weather-jsonUse the npm run serve command to start a local web server.
npm run serve
As you can see in the terminal, the CLI has started up a local server on “http://localhost:8080”. Open a new tab on your browser and enter this URL.
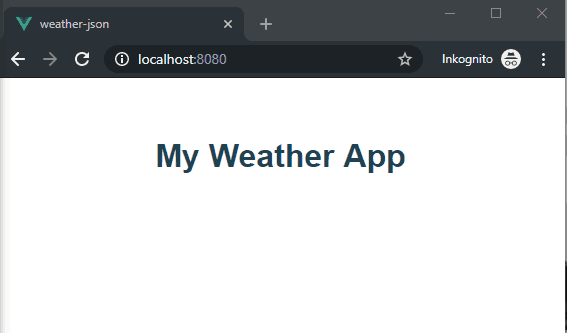
You should see something like this:

We will change this completely. This is a live reload server. This means that every change you do in the project, it will reflect those changes in the GUI. No need to waste valuable seconds refreshing the site manually :).
#3 Create the Weather Component
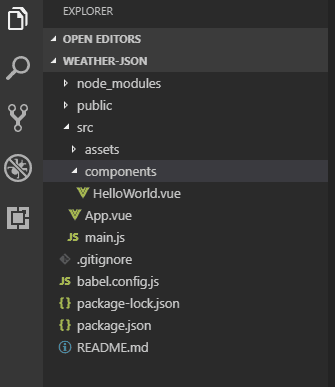
The project folder should look something like this:
In the components folder, create a new file called Weather.vue and add this code:
// Weather.vue

<template>
  <div>
      <h1>My Weather App</h1>
  </div>
</template>

<script>
export default {
  name: 'Weather'
}
</script>
Here we have created a simple component displaying a header tag with “My Weather App”. We will work more on this shortly.
In the App.vue file, we have changed the code to this:
// App.vue

<template>
  <div id="app">
    <Weather />
  </div>
</template>

<script>
import Weather from './components/Weather.vue'

export default {
  name: 'app',
  components: {
    Weather
  }
}
</script>

<style>
#app {
  font-family: 'Avenir', Helvetica, Arial, sans-serif;
  -webkit-font-smoothing: antialiased;
  -moz-osx-font-smoothing: grayscale;
  text-align: center;
  color: #2c3e50;
  margin-top: 60px;
}
</style>
We have only changed the code within the template tag and the script tag.
In the template tag, we removed all the HTML within the div tag and replaced it with our Weather component.
In the script tag, we removed the HelloWorld component and replaced it with our Weather component.
When we save our files, our local server should reload and show us this web page:
#4 Get the Weather Data from the Local JSON File
Let’s get started fetching our weather data.
We will be using a simple JSON file for fetching the data.
// weather.json

[
  {
    "id": 1,
    "location": "London",
    "abbr": "s",
    "time": "07:15 pm",
    "temp": 59
  },
  {
    "id": 2,
    "location": "New York",
    "abbr": "hr",
    "time": "12:10 pm",
    "temp": 64
  },
  {
    "id": 3,
    "location": "Los Angeles",
    "abbr": "c",
    "time": "15:15 pm",
    "temp": 77
  },
  {
    "id": 4,
    "location": "Sydney",
    "abbr": "lc",
    "time": "19:35 pm",
    "temp": 85
  },
  {
    "id": 5,
    "location": "Berlin",
    "abbr": "hc",
    "time": "03:15 pm",
    "temp": 55
  }
]
Copy the JSON content in a file called weather.json. Add the file into the root of the public folder of your project.
Change the code in the script section in Weather.json to look like this:
<script>
export default {
  name: "Weather",
  data() {
    return {
      weatherDataList: []
    };
  },
  methods: {
    getWeatherData() {
      fetch("weather.json")
        .then(response => response.json())
        .then(data => (this.weatherDataList = data));
    }
  }
};
</script>
We have created a variable called weatherDataList. We will fill this variable with the data from the JSON file.
Then create a method called getWeatherData. Here we use the fetch API to fetch the data from the JSON file. This returns a promise and we are using the then function to handle the response.
With the fetch API we need to call the json() function which reads the response to the completion. This also returns a promise, so we need to chain a new then method to get the JSON data that we want.
Even though we are fetching the data from a file, we do the exact same thing when fetching data from an URL. Just replace “weather.json” with the API URL.
#5 Display the Raw JSON Data on the Web Page
Add this in the template section of the weather.vue file:
// weather.vue

<template>
  <div>
    <h1>My Weather App</h1>
    <button v-on:click="getWeatherData">Get Weather Data</button>
    <div>{{weatherDataList}}</div>
  </div>
</template>
This is just a simple template to check if are fetching the JSON data correctly.
Notice on the button we have added v-on:click="getWeatherData". This is a click listener which will execute the getWeatherData when clicked.
In the next div, we will display the raw JSON data in the view.
Now, click the button and you should see this as a result:
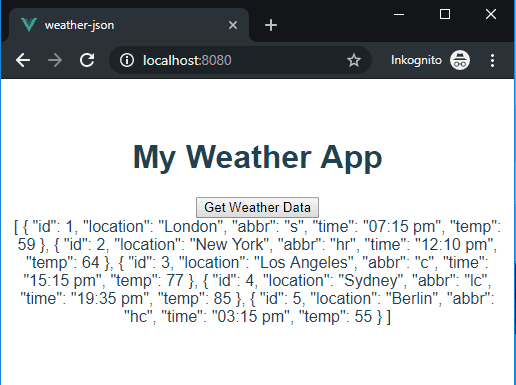
Not pretty, but we now have the confidence that the data fetching worked as it should.
#6 Create a User-Friendly GUI
We can now focus on displaying the data in a more user-friendly way.
Change the template section in the Weather.vue file like this:
// Weather.vue

<template>
  <div>
    <h1>My Weather App</h1>
    <button v-on:click="getWeatherData">Get Weather Data</button>
    <div v-for="weatherData in weatherDataList" :key="weatherData.id" class="weather-data">
      <div class="weather-stats">
        <div>
          <span>{{weatherData.time}}</span>
        </div>
        <div>
          <span class="location">{{weatherData.location}}</span>
        </div>
      </div>
      <div class="weather-icon">
        <img :src="`https://www.metaweather.com/static/img/weather/${weatherData.abbr}.svg`">
      </div>
      <div class="weather-temp">
        <span>{{weatherData.temp}}°</span>
      </div>
    </div>
  </div>
</template>
Instead of the raw JSON data, we are using the v-for directive to loop through each element in the weatherDataList. We can then add the properties in the HTML by using the double bracket syntax.
We are using images from https://www.metaweather.com/ to display some beautiful weather logos.
If you try to get the weather data now, you will notice that the app looks horrible. Let’s change that by adding some CSS.
Add styles:
// Weather.json

<style scoped>
.weather-data {
  display: flex;
  align-items: center;
  margin-top: 20px;
  margin-left: 20px;
  border-bottom: 2px solid #ccc;
  padding: 20px;
}

.weather-icon {
  flex-grow: 1;
}

.weather-stats {
  flex-grow: 8;
  text-align: left;
  padding-left: 20px;
}

.weather-stats .location {
  font-size: 30px;
}

.weather-temp {
  flex-grow: 1;
  font-size: 35px;
}

img {
  width: 70px;
}

button {
    padding:10px;
    background-color: #1aa832;
    color: white;
    border: 1px solid #ccc;
}
</style>
I’m not going to go into details about the styles here. We are using flexbox to lay out all the element in the page.
Here is the final result:
#7 Bonus: Fetching the data using axios
As we saw earlier, we used the fetch API to get the JSON data from our weather.json file.
Fetch has a few shortcomings. Like we demonstrated earlier with fetch, we needed to chain two then functions to the call the get the data. This is simplified with axios.
Let’s replace our current fetch function with axios.
First install to our project. Enter this in the command line from the project folder:
npm install axiosImport axios by placing this right below the <script> tag in Weather.vue:
import axios from 'axios';Change the getWeatherData method to look like this:
// Weather.vue

getWeatherData() {
      //   fetch("weather.json")
      //     .then(response => response.json())
      //     .then(data => (this.weatherDataList = data));
      axios.get("weather.json").then(response => (this.weatherDataList = response.data));
    }
As you can see, this is a simpler syntax and the app works just the same.
Here is the code for the complete Weather.vue app:
// Weather.vue

<template>
  <div>
    <h1>My Weather App</h1>
    <button v-on:click="getWeatherData">Get Weather Data</button>
    <div v-for="weatherData in weatherDataList" :key="weatherData.id" class="weather-data">
      <div class="weather-stats">
        <div>
          <span>{{weatherData.time}}</span>
        </div>
        <div>
          <span class="location">{{weatherData.location}}</span>
        </div>
      </div>
      <div class="weather-icon">
        <img :src="`https://www.metaweather.com/static/img/weather/${weatherData.abbr}.svg`">
      </div>
      <div class="weather-temp">
        <span>{{weatherData.temp}}°</span>
      </div>
    </div>
  </div>
</template>
<script>
import axios from "axios";
export default {
  name: "Weather",
  data() {
    return {
      weatherDataList: []
    };
  },
  methods: {
    getWeatherData() {
      //   fetch("weather.json")
      //     .then(response => response.json())
      //     .then(data => (this.weatherDataList = data));
      axios
        .get("weather.json")
        .then(response => (this.weatherDataList = response.data));
    }
  }
};
</script>
<style scoped>
.weather-data {
  display: flex;
  align-items: center;
  margin-top: 20px;
  margin-left: 20px;
  border-bottom: 2px solid #ccc;
  padding: 20px;
}

.weather-icon {
  flex-grow: 1;
}

.weather-stats {
  flex-grow: 8;
  text-align: left;
  padding-left: 20px;
}

.weather-stats .location {
  font-size: 30px;
}

.weather-temp {
  flex-grow: 1;
  font-size: 35px;
}

img {
  width: 70px;
}

button {
  padding: 10px;
  background-color: #1aa832;
  color: white;
  border: 1px solid #ccc;
}
</style>
Final Words
Hope you learned something in this tutorial.
If you are new to Vue.js and want to learn more, I highly recommend their excellent official documentation.
If you want to go more in depth, I recommend this great extensive course by Maximillian with over 21 hours of high-quality videos.
Happy coding!